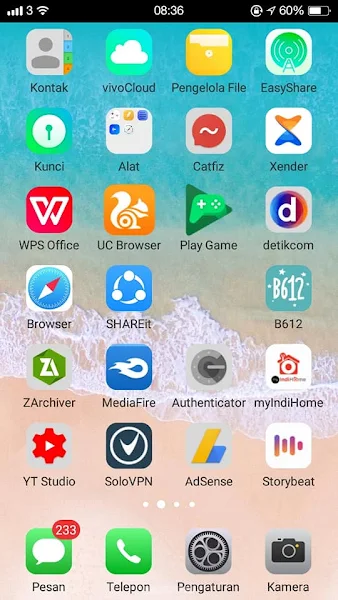
Android and iPhone status bar displays are different, if most Android smartphones have a clock display on the left or right, then on a very typical iPhone is a clock display in the center and a signal on the left. In addition to the clock and signal, usually on the status bar there is also information on the use of our phone battery.
Because of the unique appearance of the iPhone status bar, it is not surprising that many are looking for ways to change the appearance of the Android status bar to be like an iPhone by moving the clock position to the center and the signal to the left.
Because the Android system is easy to modify, there are many applications in the Play Store that we can use to change the appearance of our status bar to be like an iPhone.
In this article, I will try to share how to change the Android status bar to be really iPhone-like. This application is not available in the Play Store so you have to download and install it manually.
It should be noted that the disadvantage of using this application is that it only works for users of old school devices such as Android 7, while the latest Android version cannot. Check out the full article below.
Change Android Status Bar like iPhone
If users are curious about how to change Android status bar to iPhone 100% similar then you can see the guide as follows.
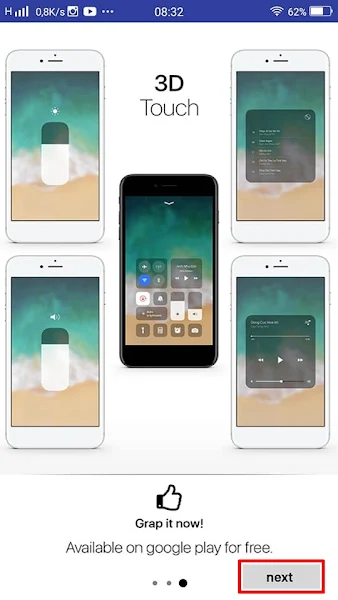
Step 1. Please download and install the Stylish inoty iPhone xs app first here . After that open the app and swipe the screen to the left up to 3 dots, then tap Next.
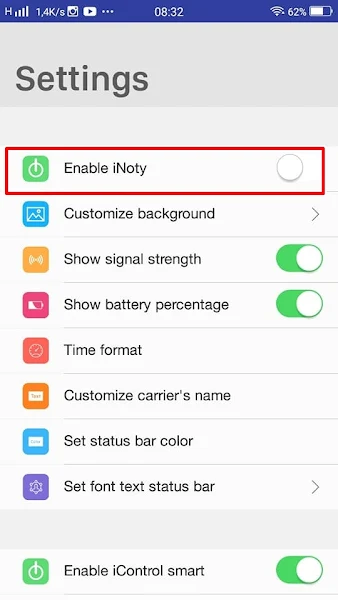
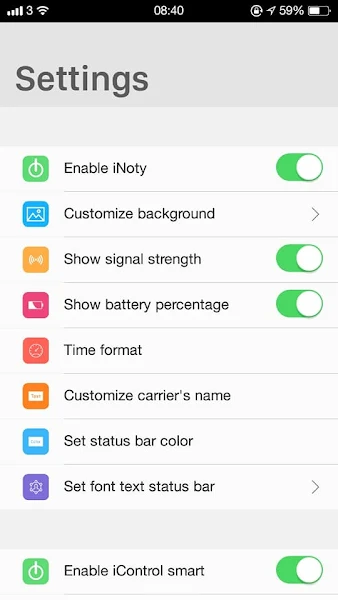
Step 2. Please activate the Enable Inoty section.
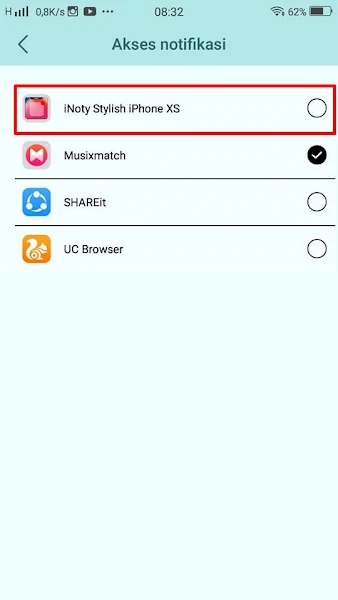
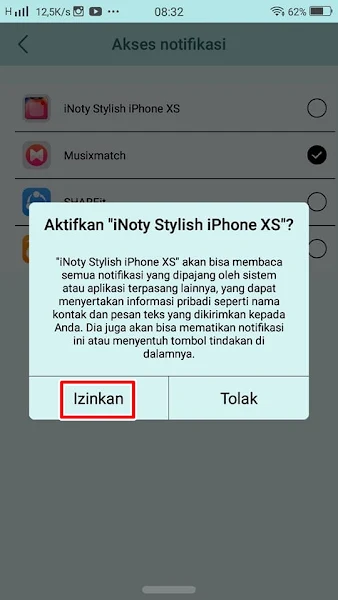
Step 3. Also enable it in the Inoty Stylish Iphone XS section – tap Allow then return.
Step 4. Done then your iPhone status bar will appear as below.
Step 5. You can also set other settings such as the time format, status bar color, font type for the status bar and others as you wish in the settings section.
Thus how to Change Android Status Bar to Iphone 100% Similar, hopefully useful and good luck.
You also need to know about How to Change Android Keyboard to iPhone 100% Similar as previously explained by JavaPhones. If you have other steps, then you can write it in the comments column below.

